You’ve got a powerful tool, but are you making the most of it? Understanding camera settings is like unlocking a treasure chest of creative possibilities. Whether you’re capturing breathtaking landscapes or candid moments, knowing how to manipulate aperture, shutter speed, and ISO can elevate your photography game.
From unraveling the intricacies of manual mode to harnessing the magic of the exposure triangle, we’ve got you covered. We’ll explore how different settings impact your shots and provide practical tips for balancing light and shadow. So get ready to take charge of your images like never before.
Key Takeaways
- Understanding the different camera modes is crucial for capturing the best photos in various situations.
- Beginners should focus on mastering essential settings such as aperture, shutter speed, and ISO to improve their photography skills.
- Learning to use manual mode empowers photographers to have full control over their camera settings for more personalized and creative shots.
- Exploring advanced settings like white balance, metering modes, and focus modes can significantly enhance the quality of photographs.
- Optimizing camera performance through lens selection, image stabilization, and sensor cleaning is essential for consistently high-quality images.
- Experimenting with creative photography techniques and shooting modes allows photographers to express their unique vision and style.
Understanding Camera Modes
DSLR Basics
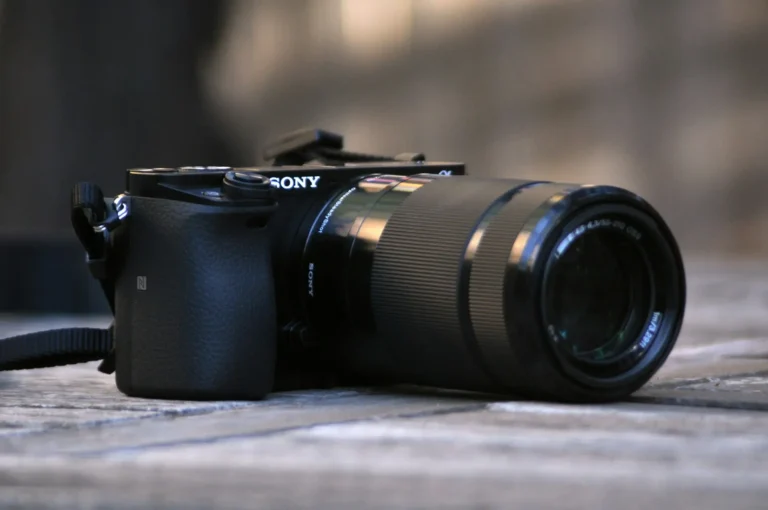
Getting to know the components of your DSLR camera is crucial. You can elevate your photography game by familiarizing yourself with the different shooting modes available on your DSLR. Learn about your DSLR’s basic settings and functions, such as adjusting aperture, shutter speed, and ISO.
It’s essential to explore the various shooting modes on your DSLR, like Program (P), Aperture Priority (A/Av), Shutter Priority (S/Tv), and Manual (M). Each mode offers a unique way of controlling exposure and capturing images in specific conditions. For example, using Aperture Priority mode allows you to control depth of field by adjusting the aperture setting while letting the camera determine the appropriate shutter speed for proper exposure.
Different Modes
Auto ISO
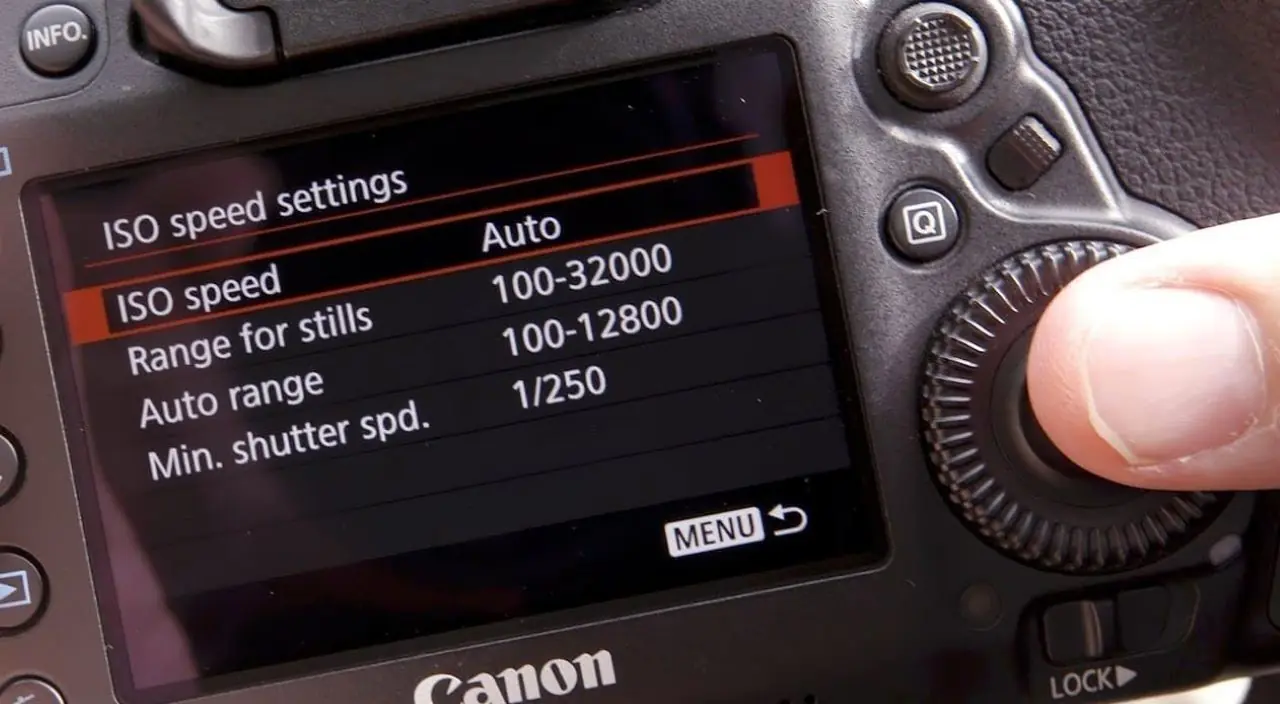
Understanding how Auto ISO works enables you to make informed decisions when choosing this setting for optimal results in different shooting scenarios. When enabled, Auto ISO adjusts sensitivity based on lighting conditions automatically. This feature proves helpful when shooting in environments with changing light or when capturing fast-moving subjects under varying light levels.
Knowing how and when to enable or disable Auto ISO according to different lighting situations ensures that your photos balance brightness and noise levels.
Drive Mode
Exploring various drive modes like single-shot, continuous, and self-timer gives you more control over capturing multiple images in succession. Single-shot mode captures one image each time you press the shutter button; continuous mode allows for a series of shots as long as the button is held down; self-timer lets you set a delay before an image is captured after pressing the shutter button.
Understanding how drive mode affects photo capture helps select specific modes for diverse photography situations. For instance, continuous drive mode is beneficial when photographing sports events or any fast-paced action where multiple frames are needed within seconds.
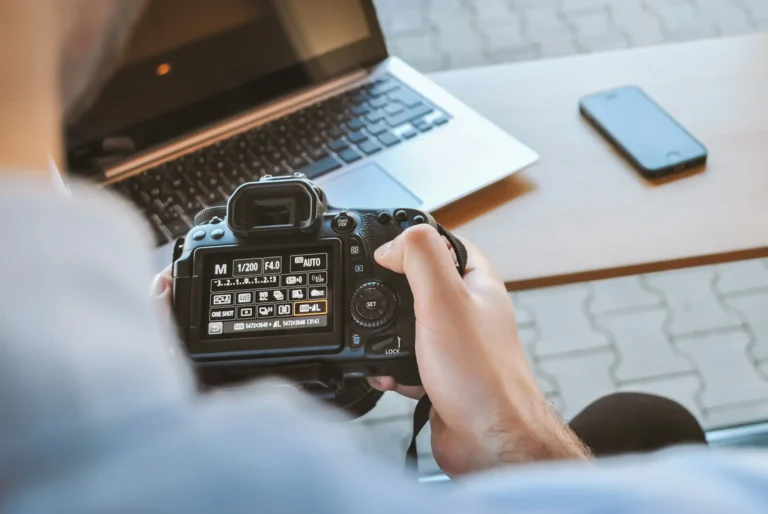
Manual Mode
Mastering manual mode settings grants full control over exposure by adjusting aperture size, shutter speed duration, and sensor sensitivity (ISO). Understanding their relationship ensures that each element contributes harmoniously towards achieving well-exposed photographs under varying conditions.
Essential Settings for Beginners
Shutter Speed
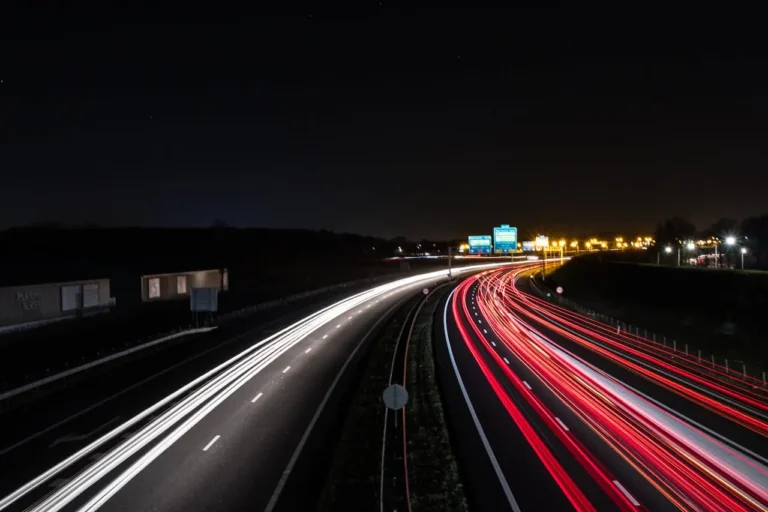
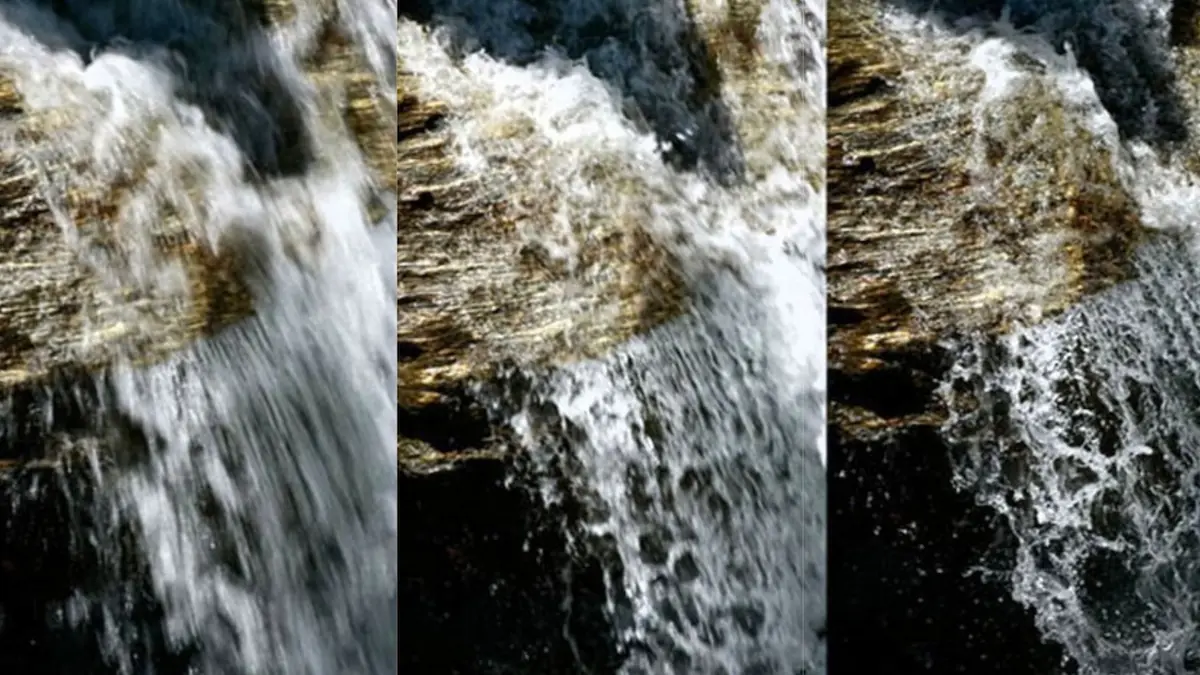
Adjusting the shutter speed allows you to control how motion is captured in your photos. When capturing fast-moving subjects, such as a running athlete or a speeding car, using a faster shutter speed will freeze the action. On the other hand, if you want to convey movement and create a sense of blur in your images, using a slower shutter speed can achieve that effect. For instance, when photographing flowing water or traffic trails at night, slowing down the shutter speed can produce stunning results.
Experiment with different shutter speed settings to adapt to various scenarios. Opt for faster shutter speeds for dynamic subjects like athletes in action or wildlife on the move. Meanwhile, try slower shutter speeds for static scenes like landscapes or portraits where you want to introduce some motion blur creatively.
Aperture
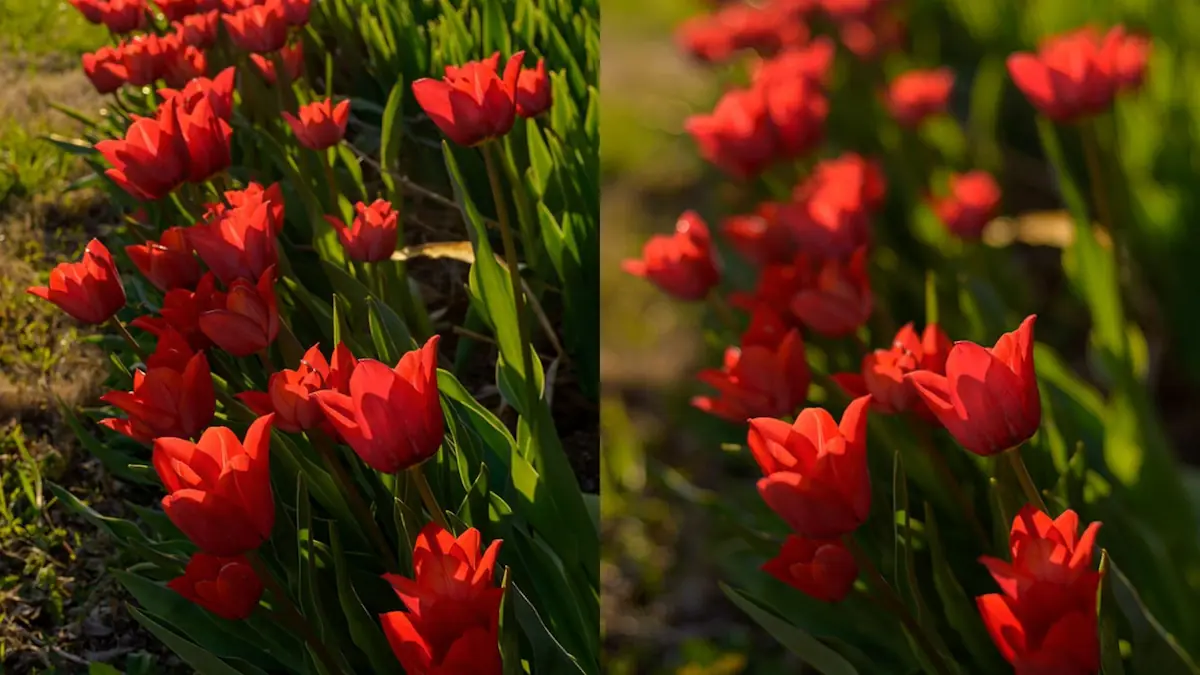
Understanding the aperture is crucial for achieving professional-looking photographs. The aperture setting controls the lens opening size through which light enters your camera. A lower f-stop number (e.g., f/2) represents a wider aperture that lets in more light and creates a shallow depth of field with background blur—ideal for portrait photography where you want your subject to stand out against a soft background.
Conversely, higher f-stop numbers (e.g., f/16) indicate smaller apertures that allow less light but result in sharper backgrounds suitable for landscape photography where foreground and background details must be sharp.
Experiment with different aperture settings based on what you aim to capture creatively. Use wider apertures for artistic shots emphasizing one specific element while employing narrower apertures when shooting landscapes or cityscapes requiring maximum detail throughout the frame.
ISO Setting

Mastering ISO settings is essential when shooting in low-light conditions without compromising image quality due to noise. When working under dim lighting indoors or during twilight hours outdoors, increasing ISO sensitivity helps maintain proper exposure levels without needing longer exposure times that may lead to blurry images from camera shake.
Reducing high ISO noise involves techniques such as utilizing lower ISO levels whenever possible and exploring your camera’s built-in high ISO reduction options, which help minimize digital noise effectively without sacrificing image clarity.
Mastering Manual Mode
Focus Settings
Understanding focus is crucial for capturing sharp and well-defined images. Your camera offers different focus modes, including autofocus and manual focus. The camera automatically adjusts the lens with autofocus to ensure your subject appears sharp. On the other hand, manual focus gives you full control over focusing by adjusting the lens yourself.
Selecting the appropriate focus mode is essential for various photography subjects, such as portraits or landscapes. For instance, continuous autofocus can help maintain sharpness as your subject moves within the frame when photographing a moving subject, like a sports event or wildlife. Conversely, for stationary subjects where precision is key, utilizing single autofocus ensures that your subject remains in perfect focus.
Understanding how to switch between these modes based on your shooting conditions will significantly enhance your ability to consistently capture clear and focused images.
Metering Modes
In addition to mastering autofocus settings on your camera, it’s equally essential to comprehend metering modes for accurate exposure calculations. Your camera provides various metering modes, including evaluative, spot, and center-weighted metering. Each mode influences how your camera assesses light in a scene and calculates exposure settings accordingly.
For example,** spot metering** measures light from a specific area in the frame rather than considering the entire scene’s brightness levels. This mode is handy when dealing with high-contrast scenes or backlit subjects since it allows you to prioritize exposure readings for specific areas of interest within an image.
By understanding how each metering mode operates and learning when to utilize them effectively based on different lighting scenarios, you’ll achieve more accurate exposures in challenging lighting conditions.
Exposure Compensation
Exposure compensation empowers you with greater control over adjusting brightness levels in your photos beyond what automatic exposure settings provide. Whether you need to correct underexposed or overexposed images due to tricky lighting situations,
you can use exposure compensation effectively by dialing positive values (+) if an image appears too dark (underexposed) or negative values (-) if it looks too bright (overexposed). Doing so tells your camera’s automatic system that it needs adjustments from its standard evaluation of proper exposure.
Mastering this feature enables you to adjust overall brightness and intentionally create moodier or brighter compositions while maintaining proper exposure levels.
Exploring Advanced Settings
Now that you’ve mastered the manual mode let’s delve into camera settings that can take your photography to the next level.
White Balance
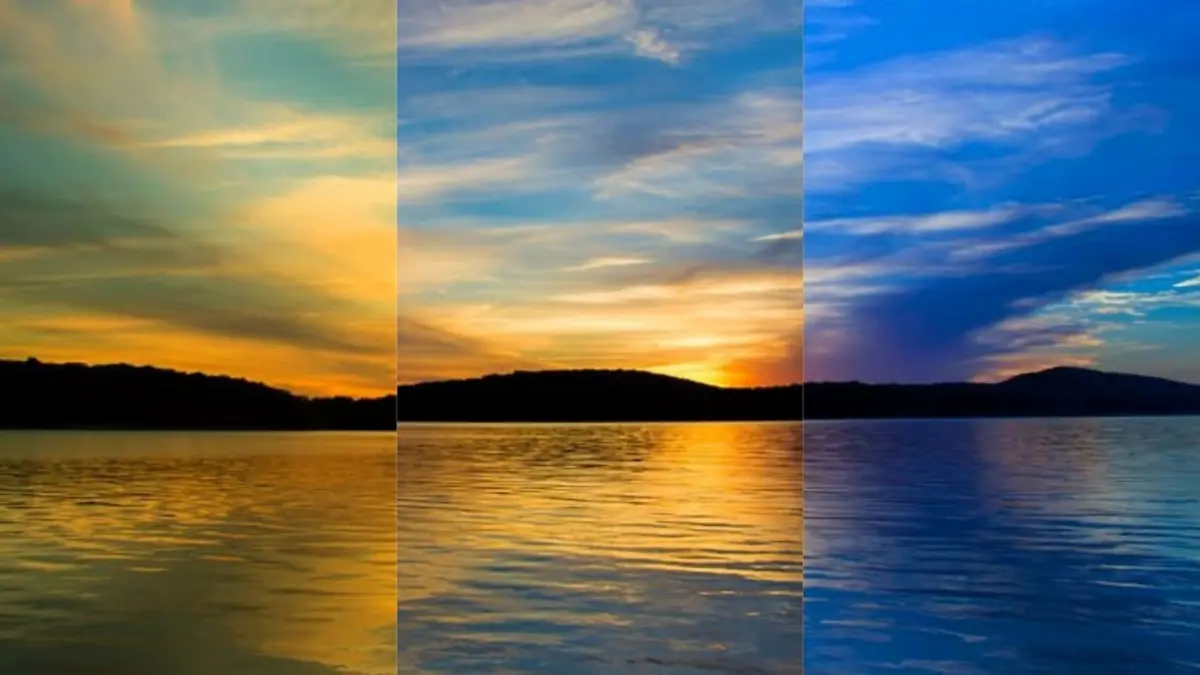
Understanding white balance is crucial for achieving accurate color representation in your photos. Different lighting conditions, such as daylight, cloudy, or indoor lighting, require adjustments to maintain natural colors. By utilizing white balance presets like daylight, shade, or tungsten, you can ensure that your photos accurately reflect the true colors of the scene. Moreover, learning to manually adjust white balance gives you precise control over color temperature based on specific environmental nuances.
You gain more post-processing flexibility when shooting in RAW format instead of JPEG. RAW files contain unprocessed data captured by the camera sensor and preserve a broader range of colors and tones than compressed JPEG files. This allows for extensive editing without compromising image quality. As a result, professional photographers often prefer shooting in RAW format due to its unmatched potential for refining images during post-production.
Color Space
The choice of color space, such as sRGB or Adobe RGB, significantly impacts how digital images display color information across different devices. Understanding these options is essential for ensuring consistent and accurate color reproduction in your photographs. For instance, while sRGB is suitable for web-based content and standard monitors with limited color capabilities, Adobe RGB offers a broader spectrum ideal for professional printing and high-quality displays.
Optimizing Camera Performance
Image Stabilization
Image stabilization is crucial when capturing photos to reduce blurriness caused by shaky hands. It helps enhance the sharpness of your handheld shots, especially in low-light conditions or when using a telephoto lens. There are two main types of image stabilization: optical and sensor-shift. Optical stabilization is built into the lens, while sensor-shift stabilization moves the camera’s sensor to compensate for movement.
For instance, if you’re shooting a moving subject in dim light without a tripod, optical image stabilization can help maintain clarity by counteracting camera shake. On the other hand, sensor-shift stabilization adjusts the position of the camera’s sensor to minimize blur caused by movement. Understanding these different systems empowers you to choose lenses and cameras that best suit your photography needs.
Noise Reduction
Long Exposure
Creating stunning long-exposure photographs involves understanding how this technique captures motion and produces unique visual effects. Using longer exposure times—typically more than one second—you can capture flowing water as smooth streaks or car lights as beautiful trails across an urban landscape.
Consider investing in a sturdy tripod to stabilize your camera during longer exposures to achieve successful long-exposure shots. Use a remote shutter release or set a self-timer on your camera to prevent any physical contact that could cause vibrations during exposure.
High-ISO Noise
High ISO settings are often necessary in low-light situations but can introduce unwanted noise into your images. To mitigate high ISO noise, consider using wider apertures and slower shutter speeds whenever possible to allow more light into the camera without increasing ISO too much.
Moreover, larger sensors generally produce less high ISO noise than smaller ones because they can gather more light before reaching maximum sensitivity levels.
Creative Photography Techniques
HDR/DRO Effects
You can blend multiple exposures to achieve balanced tonality when adjusting camera settings for HDR (High Dynamic Range) and DRO (Dynamic Range Optimization) effects. For instance, if you’re capturing a landscape with bright skies and dark shadows, HDR can help balance the exposure. On the other hand, when there’s a high contrast between light and shadow in your scene, DRO can optimize the dynamic range without blending multiple shots.
Understanding when to apply these effects is crucial. Suppose you’re shooting a sunset or sunrise landscape with extreme variations in brightness levels. In that case, utilizing HDR will ensure that both the vibrant colors of the sky and the details on the land are well-exposed. Conversely, when photographing portraits in harsh lighting conditions where details may get lost in deep shadows or blown-out highlights, employing DRO can enhance overall image quality by preserving those intricate details.
Autofocus Mode
Mastering different autofocus modes such as single point AF, zone AF, and tracking AF allows you to adapt your focusing technique based on varying subject movement and composition. When photographing a stationary subject with minimal distractions in its surroundings, like a flower against a plain background, or during portrait photography sessions where maintaining focus on your subject’s eyes is paramount – selecting single point AF ensures precise focus exactly where you want it.
On the other hand, if your subjects are constantly moving within an area, like kids playing at a park or wildlife photography scenarios involving animals on the go – employing zone AF helps maintain focus across broader areas within your frame efficiently. Similarly, for fast-moving subjects that require consistent focus tracking as they move unpredictably through your composition, such as athletes competing in sports events or birds soaring across open skies – utilizing tracking AF guarantees continuous sharpness throughout their motion.
Shooting Modes for Scenarios
Optimal Modes
When capturing landscape photos, it’s crucial to use the appropriate camera settings and composition techniques. To achieve stunning landscape shots, you should pay attention to the depth of field and focal length selection. Using a small aperture (higher f-stop number), you can maximize the depth of field, ensuring that both the foreground and background are in focus. Selecting a wide-angle lens with a shorter focal length allows you to capture more of the scene.
To enhance your landscape photography skills further, consider adjusting your exposure settings to ensure proper lighting across the entire frame. You can also experiment with different focus points to highlight specific details in your landscapes.
Mastering essential camera settings such as aperture, focal length, and lighting considerations is critical for portrait photography. Adjusting the aperture allows you to control how much light enters the lens while determining the amount of background blur (bokeh) in your portraits. Choosing a wider aperture (lower f-stop number) helps create a pleasing bokeh effect while keeping your subject sharply focused.
In addition to technical settings, understanding effective posing and framing techniques is vital for achieving flattering portraits. Experiment with various angles and compositions to highlight facial features and convey emotions effectively through your photographs.
Enhancing Image Quality
Maximizing Aperture
Maximizing the aperture is crucial for enhancing image quality. By setting a wider aperture (lower f-stop value) in low light conditions, you allow more light into the lens, enabling you to capture well-exposed photos without increasing ISO sensitivity excessively. This technique is particularly beneficial when shooting indoor events or during sunset and twilight hours. For instance, if you’re photographing a dimly lit concert venue, using a wide aperture like f/1.8 will help you achieve brighter and clearer images without introducing excessive noise.
Understanding how aperture impacts depth of field control across different photography genres is essential for improving your image quality. A wide aperture such as f/2.8 or lower in portrait photography creates beautifully blurred backgrounds that make your subject stand out prominently. On the other hand, in landscape photography, employing narrow apertures (higher f-stop values) like f/11 or higher ensures that both foreground and background elements remain sharply focused.
Exploring creative uses of wide apertures (low f-stop values) allows you to express artistic flair in your photographs effectively. For example, by utilizing a wide aperture when capturing close-up shots of flowers or other subjects, you can produce visually compelling images with dreamy bokeh effects that enhance the overall appeal of your photos.
Navigating Auto ISO
Mastering the art of navigating Auto ISO settings based on changing lighting situations contributes to improving image quality in various scenarios. When shooting fast-moving subjects outdoors under varying natural light conditions, such as wildlife photography at dawn or dusk, enabling Auto ISO helps maintain optimal exposure levels without constantly adjusting manual settings.
Understanding when to enable or disable Auto ISO depending on shooting environments gives you better control over the final look of your images while maintaining consistent exposure levels throughout your photo session. For instance, if you photograph static landscapes with stable lighting conditions, like sunrise scenes where light gradually changes, disabling Auto ISO allows you to set specific sensitivity values tailored to those lighting conditions for consistent results.
Customizing Auto ISO parameters according to specific photographic needs empowers you with greater flexibility and precision in managing exposure settings effortlessly across diverse shooting situations. For example, customizing minimum shutter speed thresholds within Auto ISO settings lets you prioritize sharpness by preventing motion blur when capturing moving subjects at different focal lengths.
Closing Thoughts
You’ve now unlocked a treasure trove of knowledge of camera settings, empowering you to take your photography skills to new heights. From mastering manual mode to exploring advanced settings, you’ve gained the tools to unleash your creativity and enhance image quality. As you continue on your photography journey, remember that practice makes perfect. Experiment with different settings, embrace creative techniques and don’t be afraid to push the boundaries of conventional photography.
Now, grab your camera and put your newfound knowledge into action. Whether capturing breathtaking landscapes or candid moments with friends, each click of the shutter is an opportunity to apply what you’ve learned. Keep honing your skills, stay curious, and, most importantly, have fun behind the lens. Happy shooting!
Frequently Asked Questions
What are the different camera modes, and when should I use them?
Camera modes like Aperture Priority, Shutter Priority, and Manual offer control over specific settings. Use Aperture Priority for controlling depth of field, Shutter Priority for motion blur, and Manual for full creative control.
How can I enhance image quality without investing in expensive gear?
Focus on optimizing your current camera’s settings by adjusting the white balance, using the right ISO setting for the lighting conditions, and ensuring proper exposure. Clean your lens regularly to avoid image degradation.
What are essential camera settings that beginners should learn first?
Mastering basic settings such as aperture, shutter speed, ISO, and white balance. Understanding these fundamentals will provide a solid foundation for capturing well-exposed and visually appealing images.
When is it best to switch to manual mode instead of relying on automatic settings?
Manual mode offers complete control over all aspects of exposure. It’s beneficial when you want precise control over depth of field or when dealing with challenging lighting conditions that may confuse automatic modes.
How can I optimize my camera’s performance to capture better photos in various scenarios?
Familiarize yourself with your camera’s autofocus system to ensure sharp images. Experiment with different shooting modes based on the scenario – landscape photography or capturing fast-moving subjects.